The very first step in creating a report in OBIEE is to create a data source. This step is required to connect to the back end database.
Go to Managed Data sources and add a new data source.

Specify the details for the database you want to connect

And save the connection.
Create a Data Model
Log in to your BI console and create a new data model

The data model is synonymous to the data definition that is created using the conventional ways.
Create a new data set for sql query as shown below

We will select the order management header and details table.
First data set we will call as header

Similar way creates a new data set and selects the details table.

Go back to the diagram panel and map the header id in header table to header id field in detail table as shown below

Now we have the basic mapping completed for the report.
We might need to add an LOV and parameter for running this report based on a parameter.
Go to the list of values and create a new LOV

This LOV will select the order number from the order header table.
Create a parameter based on the LOV we have just created.
Go to Parameter page.
Create a parameter and make sure you are selecting the parameter type as menu.
Once menu is select in the menu you will get your defined LOV.
Select the LOV and keep the default options there as it is.

Go to your group filter and now create a condition so that report can be created for the selected order number.

Save the changes and go back to your data set.
Go to the Data tab and select the order number from the drop down box and say view data
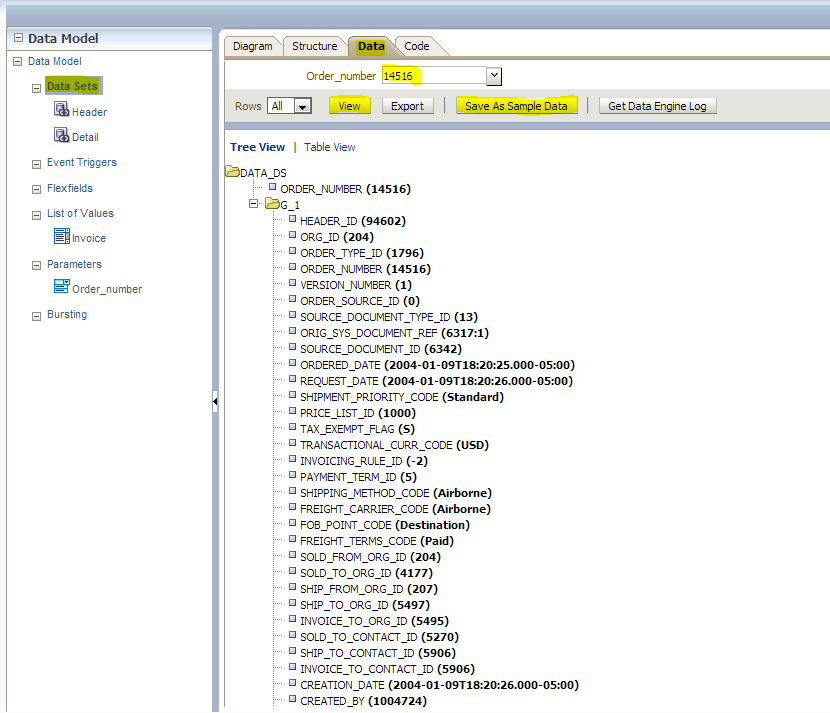
Once you reviewed that the data is correct you can save this data definition to be further used for creating a report.
Click on Save as Sample data.
Report Creation
OBIEE 11g provides pre build layout which can be directly used to create a report
Go to the home page and create a new report.

Select the data model you have created

Select the layout you wanted to use and also specify if you wanted to use header and footer.

Select few fields and drop it in the layout

Select to customize and finish the wizard.
You can go to the page and do lot of formatting as done in RTF.
You can change the date format as shown below

You can do other customization also for a detail table and use a loop for the detail table. After doing all these changes your table should look like this.

Save all the changes and test whether you are able getting a correct result.
You can select the type of format that you want for the report output

So if you select PDF format your output will be something like this

No comments:
Post a Comment