Friday, April 30, 2010

How to copy multiple input variable to multiple output variable using Transformation activity in BPEL

In last exercise we have created a business process for getting multiple order.

In this exercise we will see how to assign these multiple input to multiple output

variable.

As a though process what should be an ideal way of doing this.

We should have counter which could count the number of input variable and then we should use a loop where in we should assign the variables as an array to output variable such as

input[i] to output[i]

where in i is a variable which varies from zero to (n-1)

n is the count of nodes.

Yes it is a correct approach but it can also be done through transform activity in BPEL.

Transform activity is basically an xsl transformation.

Just have a look in my earlier post

Learning XML and
Transforming XML document using XSL transformation

XSL is a style sheet language.It is basically a XML language which transforms the raw xml document in to user defined format.We can include html tags also within it for front end presentation.

We will use the previous BPEL process itself in this exercise also.

Drag and drop a transform activity in between the receive and callbackClient.

Now in the source variable choose input variable payload and in the target choose output variable as payload.


Click on create button as shown to create a transformation

Transformation1.xsl and say apply ,it will open up a transformation page.

Now go to the design of the transformation.

Drag and drop for-each XSLT from XSLT construct in component pallete in the list of element.

Then map the input to output list and each input element to each output element each.

Save the project.

So it should appear something like this


We will try to understand more on this by looking at its source code.So here is the source code.

The XSL element can be used to select every XML element of a specified node-set.So as you can see in the xml document we are designing the output variable which does the following action.

For each element of arpit:BPELProcess1ProcessRequest/arpit:listElement

copy the value of arpit:itemID and arpit:itemValue to the corersponding output variable.

The element can be used to extract the value of an XML element and add it to the output stream of the transformation

I know it is not that easy to understand but i will suggest to get some idea of XSL and then you will be able to get it easily.


<xsl:template match="/">
<arpit:BPELProcess1ProcessResponse>
<xsl:for-each select="/arpit:BPELProcess1ProcessRequest/arpit:listElement">
<arpit:listElement>
<arpit:itemID>
<xsl:value-of select="arpit:itemID"/>
</arpit:itemID>
<arpit:itemValue>
<xsl:value-of select="arpit:itemValue"/>
</arpit:itemValue>
</arpit:listElement>
</xsl:for-each>
</arpit:BPELProcess1ProcessResponse>
</xsl:template>

Once done save your project and deploy it.

Now try to invoke the BPEL process.I invoked it with the following three inputs


and i can get the following output


This is just an example i have used to show you how you can use this transform activity.BAsed on your business requirement you can make the changes and design your process.

By the way did you guys noticed that the output what we get is not ordered it is just displayed in the same order as we have provided the input.

So obviously one question will come in to your mind that is it possible to sort the output variable based on some element.Yes that is possible and we will see in our next section how it can be done.We will use the same BPEL process for our understanding.

Wednesday, April 28, 2010

How to create a business Process for accepting multiple inputs using BPEL

A typical business scenario is that client is sending an order id and that can contain multiple product id.Using BPEL how can we accomplish this?

This is an easy task provided you have some basic knowledge of XSD.

We will try to design a BPEL process and see how we change our XSd to create a order which can take multiple product id.

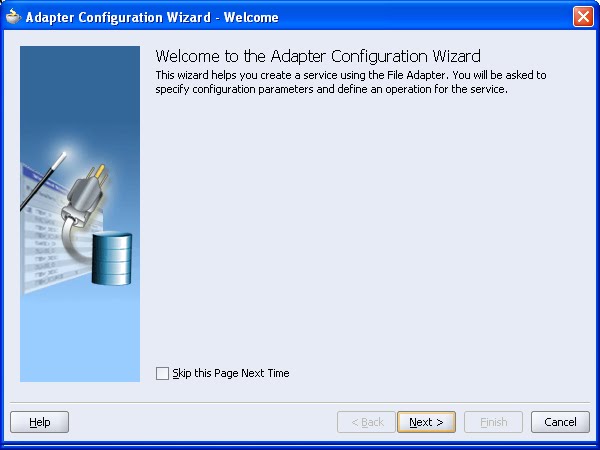
Open your Jdeveloper and create a new BPEL process


Let the default name and settings be there and just say finish.


It will create a default BPEL process.Now try to analyst the files that are created by jdeveloper automatically for this Project

You will find that it has created a .bpel ,.wsdl and a xsd file for us.

Here we will just check the xsd file because that is our concern.

Try to open the xsd file and go to source tab you will get something like this

<schema attributeFormDefault="unqualified"
elementFormDefault="qualified"
targetNamespace="http://xmlns.oracle.com/BPELProcess1"
xmlns="http://www.w3.org/2001/XMLSchema">
<element name="BPELProcess1ProcessRequest">
<complexType>
<sequence>
<element name="input" type="string"/>
</sequence>
</complexType>
</element>
<element name="BPELProcess1ProcessResponse">
<complexType>
<sequence>
<element name="result" type="string"/>
</sequence>
</complexType>
</element>
</schema>

Now i want you guys to just have a luk in my earlier post

Tuesday, February 2, 2010
XML SChema

So in this Xsd we are defining two element BPELProcess1ProcessRequest and BPELProcess1ProcessResponse of type string which mean it will take an output string as input and return to us an output string.

Now we will see how to make changes in this xsd file to fulfill our requirement.

It is important to know that the XML schema is build with elements and attributes.These building bloc comes from the namespace http://www.w3.org/2001/XMLSchema which is declared as a reserved namespace that contains elements and attributes defined in w3c schema structure specification.You can not add element or attributes to this namespace.

Using these building blocks we create our own elements and attributes and we put them in some namespace which is nothing but the target namespace or in other words the namespace where the newly created elements and attributes will reside.

So i believe you already have read the document which i have recommended.

so now we will go ahead and design our xml document.

This target name space is just an identifier and you can name it any thing what you want so i can also say
targetNamespace="http://arpit.com"

Ok so as per our requirement i will change my xsd as below

<schema attributeFormDefault="unqualified"
elementFormDefault="qualified"
targetNamespace="http://arpit.com"
xmlns="http://www.w3.org/2001/XMLSchema">

<element name="BPELProcess1Request" type="ProductType"/>
<element name="BPELProcess1Response" type="ProductType"/>

<complexType name="ProductType">
<sequence>
<element name="listElement" type="listElementType" maxOccurs="unbounded"/>
</sequence>
</complexType>

<complexType name="listElementType">
<sequence maxOccurs="unbounded">
<element name="itemID" type="string"/>
<element name="itemValue" type="string"/>
</sequence>
</complexType>
</schema>

Here i have defined both input and output message as of type ProductType.
Now if you see i have again defined ProductType as list of element which contain two values itemID and itemValue.I have set maxOccurs="unbounded" which means they can occur any number of time.This is simple xml concept which you can just have by going through xml docs.

My intention here is to make you aware of namespace concept.
Now we have designed our XSD but it is not correct.

It is because the namespace http://www.w3.org/2001/XMLSchema doesn't know about the type productType and listElementType.These we have defined by our own.So we need to modify our code so that it can understand that the their are some user defined type.For that purpose we will add one namespace to our xsd Since our xsd document is now represented by targetnamespace we will add a namespace

xmlns:arpit="http://arpit.com"

Here arpit is a namespace prefix.The idea is that whatever variable we have defined by our own we will prefix it with arpit so that parser could understand that they are user defined and belong to "http://arpit.com" namespace.

So i will change the document accordingly and it will be

So now the correct schema should look like

<schema attributeFormDefault="unqualified"
elementFormDefault="qualified"
targetNamespace="http://arpit.com"
xmlns:arpit="http://arpit.com"
xmlns="http://www.w3.org/2001/XMLSchema">

<element name="BPELProcess1ProcessRequest" type="arpit:productType"/>
<element name="BPELProcess1ProcessResponse" type="arpit:productType"/>

<complexType name="productType">
<sequence>
<element name="listElement" type="arpit:listElementType" maxOccurs="unbounded"/>
</sequence>
</complexType>

<complexType name="listElementType">
<sequence maxOccurs="unbounded">
<element name="itemID" type="string"/>
<element name="itemValue" type="string"/>
</sequence>
</complexType>
</schema>


Again one thing here to understand is that for all the other types there is default prefix because we have not used any prefix for http://www.w3.org/2001/XMLSchema

If you are using a jdeveloper you can see the structure of the document.


But again when i tried to compile my project i got following error

Error:
[Error ORABPEL-10902]: compilation failed
[Description]: in "bpel.xml", XML parsing failed because "undefined part element.
In WSDL at "file:/D:/testcase/Java/BPELProcess1/bpel/BPELProcess1.wsdl", message part element "{http://xmlns.oracle.com/BPELProcess1}BPELProcess1ProcessRequest" is not defined in any of the schemas.
Please make sure the spelling of the element QName is correct and the WSDL import is complete.
".
[Potential fix]: n/a.

This occured because i made changes in my xsd file only but all the other files that has been created by jdeveloper still have the reference for the variable
BPELProcess1ProcessRequest and BPELProcess1ProcessResponse

So simply to avoid this issue we can change our xsd and make it as

<schema attributeFormDefault="unqualified"
elementFormDefault="qualified"
targetNamespace="http://xmlns.oracle.com/BPELProcess1"
xmlns:arpit="http://xmlns.oracle.com/BPELProcess1"
xmlns="http://www.w3.org/2001/XMLSchema">

<element name="BPELProcess1ProcessRequest" type="arpit:productType"/>
<element name="BPELProcess1ProcessResponse" type="arpit:productType"/>

<complexType name="productType">
<sequence>
<element name="listElement" type="arpit:listElementType" maxOccurs="unbounded"/>
</sequence>
</complexType>

<complexType name="listElementType">
<sequence maxOccurs="unbounded">
<element name="itemID" type="string"/>
<element name="itemValue" type="string"/>
</sequence>
</complexType>
</schema>


Ot if you don't want to change your xsd you need to change your WSDL file which still has the reference for that old message type.So just go to the WSDL and make change in the wsdl message as


~~~~~~~~~~~~~~~~~~~~~~~~~~~~~~~~~~~~~~~~~~~~~~~~~~~~~~~~~~~~~~~~~~~~~ -->
<message name="BPELProcess1RequestMessage">
<part name="payload" element="client:BPELProcess1Request"/>
</message>

<message name="BPELProcess1ResponseMessage">
<part name="payload" element="client:BPELProcess1Response"/>
</message>


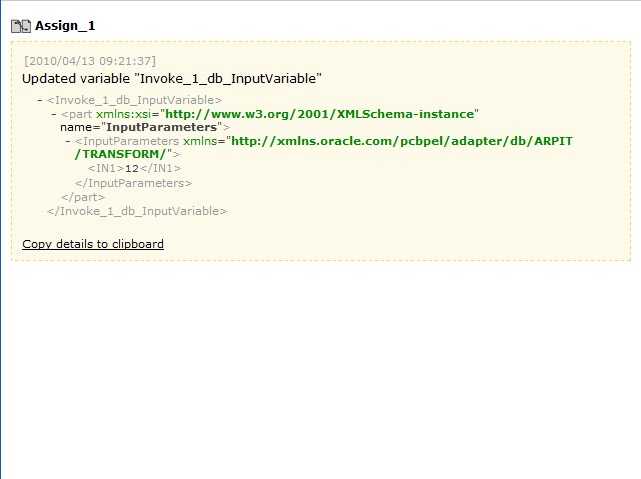
Now you have completed the input and output file just drag and drop an assign activity and map input to output variable just to make some sense to the project.


Now deploy your project to the server and go to BPEL console to check the process.

Now you can see you will get a plus sign which you can click to get more than one input.In my case i am taking two input


SO i went to check the result and i got following error in my assign activity

XPath query string returns multiple nodes.
According to BPEL4WS spec 1.1 section 14.3, The assign activity part and query /client:BPELProcess1ProcessRequest/client:listElement/client:itemID should not return multipe nodes.
Please check the BPEL source at line number "70" and verify the part and xpath query /client:BPELProcess1ProcessRequest/client:listElement/client:itemID.
Possible reasons behind this problems are: some xml elements has maxOccurs > 1 or the xml data is invalid according to XML Schema.
To verify whether XML data received by a process is valid, user can turn on validateXML switch at the domain administration page.


Well this error is because we have not defined any rule in our assign activity to assign each input variable to each output variable.This can be verified if you will try to invoke your process with a single input and you can find the output but for multiple input we have to process it in a different way.

So what we can do is that we can either use a loop and then we can use assign activity within that loop to copy each input to output or we can either use flowN activity or you can have some of your own logic.

Well you cam also use a transform activity and use for -each to assign each input variable to corresponding output variable.Discussing all in a same post will make it too complex so we will cover it sometimes later.

Tuesday, April 27, 2010

How to create a jar file from several existing files

The basic format of the command for creating a JAR file is:

jar cf file-name (all input-file)


The c option indicates that you want to create a JAR file.The f option indicates that you want the output to go to a file rather than to stdout.The c and f options can appear in either order, but there must not be any space between them.

file-name is the name that you want the resulting JAR file to have. By convention, we use a .jar extension for jar files.

The (all input-file) argument is a space-separated list of one or more files that you want to include in your JAR file. (all input-file) argument can contain the wildcard * symbol which means include all the files in that directory. If any of the input-files are directories, the contents of those directories are added to the JAR thus created.

I will give an example to illustrate this.

I have a folder which contains two class files

HumanTaskTest.class and HumanTaskTestBean.class

Nnow we will see how to jar it.

Open a command prompt and navigate till the directory where in you have stored your class files


Now use the following command

>jar cf HumanTask *

It will create a jar file with name HumanTask and will contain all the file in that folder.

But we recommend to use the .jar extension while creating a .jar file

also instead of * you can use the individual file name as

jar cf HumanTask.jar HumanTaskTest.class HumanTaskTestBean.class


It will contain a file HumanTask.jar and will include the two class files


we have further more options like using jar command options

like if you use following command

jar cvf human.jar *

It will again create a .jar file which will produce verbose output on your console as


Now one interesting thing.

Try to extract this .jar file now created.

It will produce the two class file and one more folder which we have not defined any where it will be bydefault META-INF folder.

If you will open this you will get a file called MANIFEST.MF

When you extract a jar file , it automatically creates a default manifest file. There can be only one manifest file in an archive, and it should always have the pathname as META-INF/MANIFEST.MF

It contains the following information

Manifest-Version: 1.0
Created-By: 1.6.0 (Sun Microsystems Inc.)


It can contain information about other files that are packaged in the archive.

So knowing bit about the manifest file we have following command options


v -It Produces verbose output on stdout while the JAR file is being built. The verbose output tells you the name of each file as it's added to the JAR file.we have already seen an example.

M -It says that the default manifest file should not be produced.

m - It is used to include manifest information from an existing manifest file. The format for using this option is:

jar cmf "existing manifest file" "jar file" "input files"

Monday, April 26, 2010

Difference between BPEL and ESB

This is again a very common question being asked by every one

Both BPEL and ESB are used to design the business process then what is the need to two components.

First of all ESB is a very light weight product in comparison to BPEL.By light weight i mean the space taken by BPEL is much more than the space taken by ESB.Space mean if the BPEL installation wizard takes 500mb of space then ESB takes only 270mb of space.

Again processing speed of ESB is much faster than BPEL.

For a simple process where we are just assigning an input variable to output variable the BPEL might take .300 seconds and esb will take only .175 seconds.


BPEL is very good for orchestration and ESB is mainly used for routing and transformation.

If we are using adapters then it is preferred to use ESB for calling third party adapters because just for copying the input to output file in a file adapter in bpel you will need to add assign activity making it a big process however in esb it can be done easily thorugh transformation.Again using filters the information can be routed to the right destination.


BPEL has lot of features which esb doesn't have.Like workflow ,email notification can be used only with BPEL.SO the bottom line is ESB should be used for transformation and routing.

Again its quite a valid point that why just for routing and transformation we should have a separate components.This was not a good design approach.

From SOA Suite 11g there is not BPEL esb separate console.

There is only one console em console from which you can see everything.

ESb has been replaced by another component called mediator which is embedded as a part of 11g.

Now in a single composite you can have your whole process.

Unlike 10g we now don't have to create separate bpel and esb process and then have to join them explicitly.

So overall 11g is going to be the next thing.

A lot of feature like EDN(Event Driven network)and other features have been added in 11g making it as a complete integration product.

Will be covering the properties of 11g sometimes later.

Difference between AQ and JMS

Aq is Oracle Advanced queuing as like IBM's Websphere MQ,thougn it doesn't have those many features as in MQ but still its being used.Advanced Queuing provides the message management functionality and asynchronous communication needed for application integration.

JMS is Java messaging service
The Java Message Service (JMS) API is a messaging standard that allows application components based on the Java 2 Platform, Enterprise Edition to create, send, receive, and read messages. It enables distributed communication that is loosely coupled, reliable, and asynchronous.

The difference between them is quite clear if we use the jdev IDE to check their functionality.

AQ only interacts with database queues.

However JMS can interact with database queues as well as in memory/file or queue's outside.

For example we can use JMS adapter to connect to weblogic or tibco queue.It is independent of the platform in which it is running.

If our server is on 0c4j container and we want to connect to weblogic queue we can use a third party connector to connect to that queue.Using Aq we can only only connect to the queue defined in database.

So we can use JMS in place of AQ but the reverse is not true.

Specifying date time and duration in BPEL and understanding its impact in WAIT activity

To get much idea on date and time format i recommend you to refer to this link.

http://www.w3.org/TR/NOTE-datetime

Here we will discuss about one of the very important activity in BPEL ,that is WAIT ativity.In Wait activity we have got two option one is the time duration and other is the timeperiod.

They are represented by two different character.IF you will have a look in the wait activity you may get their are two options for specifying time


One option if for and the other option is until so we will here try to understand what these two block mean

The first is FOR which denotes the time duration for which the thread has to wait

In BPEL the Time durations are specified in the format:
PnYnMnDTnHnMnS
where,
P - is a required character that represents period, the duration designator. All duration expressions always start with a P
Y - is the year designator. For example, to indicate 10 years, you'd use10Y
M - is the month designator. For example, to indicate 10 years, you'd use10M
D - is the days designator. For example, to indicate 10 days, you'd use 10D
T - is an optional character that indicates the start of the time duration
H - is the hour designator. For example, to indicate 10 hours, you'd use10H
M - is the minute designator. For example, to indicate 10 minutes, you'd use 10M
S - is the seconds designator. For example, to indicate 10 seconds, you'd use 10S

So if you have to specify a duration of 10 years, 05 months, 12 days, 08 hours, 37 minutes, and 46 seconds, the duration expression would look like P10Y05M12DT08H37M46S. If you want to use it in a BPEL activity, it would read:

which means wait for a duration of 19 years, 10 months, 28 days, 10 hours, 37 minutes, and 46 seconds.


Now if you will check for the entry in your source code you will find an entry like

<wait name="Wait_activity" for="P10Y05M12DT08H37M46S"/>

Again we have one more Option that is Until,here it is not time duration it is the time period at which the process has to activate.

So it means be passive until the right time comes.

IT takes the date time format

Specific date and time references have the form:
CCYY-MM-DDThh:mm:ss
where,
CC - is the century designator, specified as 2 or more digits. Valid range from 00 to ...
YY - is the year designator, specified as 2 digits. Valid range from 00 to 99.
MM - is the month designator, specified as 2 digits. Valid range from 01 to 12.
DD - is the day designator, specified as 2 digits. Valid range from 01 to 31.
T - indicates the start of the time designator.
hh - is the hour designator, specified as 2 digits. Valid range from 00 to 23.
mm - is the minute designator, specified as 2 digits. Valid range from 00 to 59.
ss - is the seconds designator, specified as 2 digits with an optional decimal value allowed of the form ss.ssss to increase precision. Valid range from 00 to 59.
z - is the optional Coordinated Universal Time (UTC). If present, it should immediately follow the time element. To specify an offset from the UTC time, append a positive(+) or negative(-) time to the datetime value of the form hh:mm.


So, to specify 07:40:19pm, 26th April 2010, the datetime expression would look like 2010-04-26T19:40:19.

If you want to use it in a BPEL WAIT activity, it would read:
<wait name="Wait_activity" until="2010-04-26T19:40:19"/>
which means wait until the deadline 07:40:19pm, 26th April 2010

UTC datetime samples:
Similarly, to specify 10:28:19am in UTC, the datetime expression would look like 10:28:19z. If you want to use it in a BPEL WAIT activity, it would read:

which means wait until the deadline 10:28:19am, in UTC.

So based on these information can we try some experiment on dynamically setting up a wait activity ;)

Difference between a Pick activity and a Receive activity

It is a very common query among people that why we go for Pick activity when we already have a receive activity with us.

Through Pick activity you can specify that the business process should await the occurrence of one event in a set of events. Events can be message events handled with the activity or alarm events handled with the activity. For each event, you specify an activity or a set of activities that should be performed.

The syntax of the activity looks like this:

<pick>

<onMessage partnerLink="name"
portType="name"
operation="name"
variable="name">

<!-- Perform an activity or a set of activities enclosed by
<sequence>, <flow>, etc. or throw a fault -->
</onMessage>

<onMessage ...>
<!-- Perform an activity -->
</onMessage>

...

<onAlarm ...>
<!-- Perform an activity -->
</onAlarm>

...

</pick>


Within Pick activity you can specify several onMessage block and several onAlarm block which are optional.

The OnMessage element In Pick Activity is identical to the receive activity and has the same set of attributes. You must specify the following attributes:

1>partnerLink: Specifies which partner link will be used for the invoke, receive, or reply.
2>portType: Specifies the used port type
3>operation: Specifies the name of the operation whose invocation to wait for
4>variable: Specifies the variable name used to store the incoming message

Using the onAlarm element, you can specify a

1>Duration expression, using a for attribute
2>Deadline expression, using an until attribute


So the best part is that you can have multiple onMessage activity which can wait for similar partner link and port type but for different operations so separate threads and parallel processes can be invoked for each operation.

The other important point about Pick activity is that it can be used as a event handler.It can be used in a scenario where in you are calling a asynchronous process and you want your process to complete without waiting for the output.But again we can define event handler in that case that is using pick activity in a scope which can deal with the flow when the message or the response arrives at the bpel process.

You can specify event handlers for the whole BPEL process or for each scope. Event handlers are specified immediately after the compensation handlers and before the main activity, as shown below:

<process ...>

<partnerLinks>
...
</partnerLinks>

<variables>
...
</variables>

<faultHandlers>
...
</faultHandlers>

<compensationHandler>
...
</compensationHandler>

<eventHandlers>

<onMessage ...>
<!-- Perform an activity -->
</onMessage>
...

<onAlarm ...>
<!-- Perform an activity -->
</onAlarm>
...

</eventHandlers>

activity
</process>

The syntax of the event handler is similar to the syntax of the pick activity. The only difference is that in event handler, you can specify zero or more onMessage events and zero or more onAlarm events.

Sunday, April 25, 2010

HOw to create an output file with same name as input file using file/ftp adapter in BPEL

Aim
=====
Our requirement is that we will be using two file adapter one for inbound and one for outbound.The name of output file generated should be same the name of the input file.


System Requirement
===================
Database oracle-10.2.0.3
SOA Suite 10.1.3.4
Jdeveloper 10.1.3.4


This is the environment i am using at my end.


Design
=======

OK The steps are as follows

1>Create a empty BPEL process.


2>Drag and drop a File adapter in the swimlane of your process.


Make it read only


Provide a location for polling the file


In the file name pattern give *.* as input


Make polling frequecy as 1 second.


Use native schema for processing.


3>Now drag and drop a receive activity and connect it to the File adapter you just have created.


4>Again drag and drop one more file adapter this time for outbound to write the file.


make it write


Give output directory and output file name


Again make it as native schema.

5>Now drag and drop a invoke activity after the receive activity in your bpel process and connect it to the fileout Partnerlink.


Ok So far most of the designing process is done but before going further in the design we need to analyse certain files in the jdeveloper.

Now if you will look at the folder for each adapter filein and fileOut you will get two files getting created for the adapter.

One is FileIn.wsdl which contains all the information that you have provided using GUI and Jdeveloper created one more file by its own it is called as FileAdapterInboundHeader.wsdl file ,If you will open this file you will get two header elements

<element name="fileName" type="string"/>
<element name="directory" type="string"/>

These contains the information about the file name and the directory from which it is coming.It is the header element for the inbound file.

Similarly we have FileAdapterOutboundHeader.wsdl which also contains the file name property.

So we will just map the input header variable for fileName to output header element so that the new file thus created will take the same name as input file.

For doing this we will create two header variable.Double click on receive activity and go to adapter tab.


6>create a variable and choose message type.


In the messag type select the inputheader wsdl file


Now our input header variable is created ,Now again double click on invoke activity
go to adapter tab and create one more header variable.

create one more variable outputheader and in the message type choose the output header wsdl


7>Now drag and drop an assign activity and assign the filename from input header to fileName in output header.


So after completion your project should look like this.


Now deploy your process and check if it works as expected.

I provided an inputfile name arpit.txt and in the output folder i got the file name as arpit.txt

Wednesday, April 14, 2010

How to Schedule a BPEL process using Quartz scheduler

Introduction
===============

Quartz is an open source job scheduler, that can integrated with any J2EE and J2SE applications.

In BPEL Process Manager, quartz is implemented as part of java class called DefaultSchedulerCalloutImpl.

AIM
=====
In this note we will try to generate a bpel process that will poll for a particular file using file adapter in some specific period of time.


Design
=========
Create a new bpel Process


Once the process is created Drag and drop an file adapter in the swimlane of the bpel process.


In the file pattern give *.* which means it can accept any type of file.


Change the polling frequency to 1 seconds


To make it simple i will use native schema for processing.


Say next and finish.

Once finished you will get the following screen in the swim lane of your process.


Now drag and drop a receive activity in the process and connect it to the file adapter.Once you will connect the file adapter to the receive activity you will get a screen where in you can define the variable and don't forget to select the create instance button over there.


NOw just to make sense of this project create a new variable and assign it the value that you are getting from the file adapter.something like this my assign will look


So once completed your process should look like this


Now if you will look at the application navigator you can find that there are two files which are created for the file adapter.


One is PickFile.wsdl

This file contains all the information that you have provided while creating a file adapter through gui that is the file location the frequency etc.

Additionally the tool itself generates a file called as fileAdapterInboundHeader.wsdl

It contains the header information.

We are often asked a question that can you create a scenario where in the output file name has same name as input file name.It is very easy you just get the input file name create a variable and assign it that name.Again in the outbound provide this name as the header.I will probably come up with full explanation sometimes later.

This was just to give a fair idea about what is going behind the scene.

Now the main setting.Just open the bpel.xml file for this service

you might get following entry if you have followed my screenshots

<?xml version = '1.0' encoding = 'UTF-8'?>
<BPELSuitcase>
<BPELProcess id="ScheduleProcess" src="ScheduleProcess.bpel">
<partnerLinkBindings>
<partnerLinkBinding name="PickFile">
<property name="wsdlLocation">PickFile.wsdl</property>
</partnerLinkBinding>
</partnerLinkBindings>
<activationAgents>
<activationAgent className="oracle.tip.adapter.fw.agent.jca.JCAActivationAgent" partnerLink="PickFile">
<property name="portType">Read_ptt</property>
</activationAgent>
</activationAgents>
</BPELProcess>
</BPELSuitcase>


We have a partner link binding which connects to the file adapter wsdl file.
We have one more thing called as activation agent.

Activation agent is nothing but a initializing parameter.You have an activation agent to whom you order that you have to pick the file so it is the starting point of the process in our case.It activates the file adapter to pick the file from the required location.

so we need to make some changes in the bpel.xml


I will change the code in bpel.xml to the following


<?xml version = '1.0' encoding = 'UTF-8'?>
<BPELSuitcase>
<BPELProcess id="ScheduleProcess" src="ScheduleProcess.bpel">
<partnerLinkBindings>
<partnerLinkBinding name="PickFile">
<property name="wsdlLocation">PickFile.wsdl</property>
</partnerLinkBinding>
</partnerLinkBindings>
<activationAgents>
<activationAgent className="oracle.tip.adapter.fw.agent.jca.JCAActivationAgent"
partnerLink="PickFile" heartBeatInterval="10">
<property name="portType">Read_ptt</property>
<property name="schedulerCallout">DefaultSchedulerCalloutImpl</property>
<property name="endpointScheduleOn">0 0 21 * * ?</property>
<property name="endpointScheduleOff">0 30 21 * * ?</property>
</activationAgent>
</activationAgents>
</BPELProcess>
</BPELSuitcase>


Now we will check what all changes we have done.

The first thing as you can notice is that i have added a property called as

heartBeatInterval="10"

The heartBeatInterval is measured in seconds, it specify that how frequently the schedule is checked. The quartz scheduler turns heartbeat on and off.

Again we have added

<property name="schedulerCallout">DefaultSchedulerCalloutImpl</property>

<property name="endpointScheduleOn">0 0 21 * * ?</property>

<property name="endpointScheduleOff">0 30 21 * * ?</property>


as we have discussed we have Quartz implemented as part of java class named DefaultSchedulerCalloutImpl so we are just calling it here.

The next two properties decide when to start the polling and when to stop it

The attribute for endpointScheduleOn and endpointScheduleoff element is cron sequence.

For more knowledge in quartz i will suggest you to go through the following documentation.

http://www.quartz-scheduler.org/docs/tutorial/

I have not done more analysis in cron job sequence but in my case


I am telling my scheduler to start at 09 and end at 09:30

<property name="endpointScheduleOn">0 0 21 * * ?</property>
<property name="endpointScheduleOff">0 30 21 * * ?</property>

So 21 here is hours and 30 is seconds.This is just an example you can look the docs and design for your own requirement.

My process will start scheduling at 9 pm and will end at 9:30 pm (21:30).

Now once the process is completed deploy and check if it works for you or not.It worked for me.

This is one of the approach you can schedule your process another approach is that you can schedule your process from database ,i don't have much knowledge in database but i will try to create one.

There is one excellent document for doing this

http://hugues.simonnet.free.fr/logiciels/blog/070114_BPEL_Scheduler.pdf

so you can go ahead with this also.

you can download the project from following location

orabpel-10902

While trying to deploy a bpel process which is calling another bpel process you are getting error

[Error ORABPEL-10902]: compilation failed
[Description]: in "bpel.xml", XML parsing failed because "undefined part element. In WSDL at
"file:/u01/app/oracle/product/10.1.3/OracleAS_1/bpel/domains/default/tmp/.bpel_HelloWorld_1.0_544a5dd23bd076b9a9ee86ec78724a4f.tmp/HelloWorld.wsdl", message part element "{http://xmlns.oracle.com/HelloWorld}HelloWorldProcessResponse" is not defined in any of the schemas.
Please make sure the spelling of the element QName is correct and the WSDL import is complete. ".
[Potential fix]: n/a.


Cause
========

In my case i was having two process HelloWorld which i had deployed to a remote server.

Then i was having another BPEL process Helloindia which was calling the HelloWorld Process through partner link.When i tried to compile the project i got the following error.

The reason is that we have not defined the host name in C:\WINDOWS\system32\drivers\etc\hosts file

When ever we are calling a remote service we must make an entry in to our hosts for that correponding server

It should be defined in such a ways

ip-address something@something.com alias-name.something.com

Once you make the changes save the hosts file and try to rebuild your project it should compile successfully.

If it doesn't work try to remove the file in the

SOA_HOME\bpel/domains/default/tmp directory and undeploy the project and redeploy it will work.

How to get the timestamp for ESB router and corresponding BPEL process.

You can check the log files to get the details about the process invoked.

For BPEL you can set the domain.log to debug mode for finer details and for ESB you can set the log.xml in debug mode for finer details.

I already have posted how to set loggers for BPEL and ESB.

you can also analyse SOA_HOME\opmn\logs to get the timestamp of different process.

I am not good in database so i can not help much in writing a query from database side .

As far as i believe as per my post

TAbles used in ESB for instance tracking

depending upon the activity type

10 – A routing rule has been executed successfully

You can create your own query something like

select timestamp from ESB_ACTIVITY where type=10

this is how you can get the timestamp for the process.

Now we will cosider how to convert this timestamp in to date and time.

If you have a look in ESB_ACTIVITY again it is

desc ESB_ACTIVITY
Name Null? Type
----------------------------------------- -------- ---------------------------
ID NOT NULL NUMBER
FLOW_ID NOT NULL VARCHAR2(256)
SUB_FLOW_ID VARCHAR2(48)
SEQ NUMBER
SUB_FLOW_SEQ NUMBER(3)
BATCH_ID VARCHAR2(48)
SOURCE VARCHAR2(48)
OPERATION_GUID VARCHAR2(48)
TIMESTAMP NOT NULL NUMBER
TYPE NOT NULL NUMBER(2)
RR_OUTPUT_STATUS NUMBER(2)
ADDI_INFO VARCHAR2(500)
IS_STALE VARCHAR2(1)

The timestamp here is coded as unix timestamp.

There are so many tools or links in internet for converting the unix timestamp to date and time.

you can use http://www.onlineconversion.com/unix_time.htm for getting the time.

Just provide the value that you get in timestamp in the Unix timestamp field and just say submit to get the time and date.

Tuesday, April 13, 2010

Email notification in SOA Suite 11g

AIM
=======
This article will help us to understand and design how to use email notification in SOA Suite 11g with your email account like gmail,yahoo or your official email account.


Pre-requisite
=============
You should have installed SOA suite 11g preferably the latest 11.1.1.2 and the Jdeveloper 11.1.1.2.You can follow my previous post for all these set ups.

Configuration
=============

Log in to the em console

http://host:port/em

Now expand Farm_SOA_domain

and expand User Messaging service

right click on usermessagingdriver-email as shown below


Now in the next screen which will come up with all the properties


Now here we need to change following parameters for email notification

* OutgoingMailServer –
* OutgoingMailServerPort –
* OutgoingMailServerSecurity –
* OutgoingDefaultFromAddress (optional) –the emailaddress that is indicated as the sender of the email message
* OutgoingUsername – the user account from which the email is sent
* OutgoingPassword – the user account’s password (stored in encrypted format)

I am using gmail as the outgoing mail server so i will specify the properties as per my gmail settings

for gmail smtp.gmail.com is the OutgoingMailServer,465 is the OutgoingMailServerPort

and security is SSL.

Once these changes are made apply those changes and now again

expand Soa and select soa-infra

Go to SOA-infrastructure

select soa-administration and click on workflow notification properties.


now following screen will come up

There change the notification mode to email,other properties need not be changed.


apply the changes and restart the server for these changes to take place.

Once server restarted just create a simple bpel process drag a email activity and in the to field give address of the email where you want to send the mail.

This information should probably work for gmail however i am not able to get the output in case of gmail some extra settings are required which i am looking for and will update as soon as i will get more information on this.

Saturday, April 10, 2010

Undestanding Stored procedure and calling it from SOA Suite db adapter

Stored procedure is a segment of code which contains declarative or procedural SQL statements.It can contains any SQL statement like INSERT, UPDATE ,MERGE or any SQL data definition like CREATE TABLE, ALTER TABLE etc.Also a stored procedure also supports procedure statements such as IF ELSE, WHILE making it not less than any programming language.

Stored procedure has several advantage

They are compiled and stored in database.So they are executed much faster so each time we need not load the sql statment and then compile then run,they are already compiled and are much faster.

Each stored procedure can have its own database priviledges so it helps in securing data also.

The most important is code reusability. Once created, a stored procedure can be reused again and again by multiple applications.

Lets try to write a simple stored procedure we will try to understand the syntax

First of all log in to the database and create a new account for our exercise.
to create a new account use following command

SQL>create user arpit identified by arpit;
User Created

Grant priviledge to arpit user.
SQL>grant dba to arpit;
Grant succeeded.

Now connect to the database using arpit as user and password

SQL> connect
Enter user-name: arpit
Enter password:
Connected.
SQL>

the first command you need to pass is

"SET SERVEROUTPUT ON".It is the SQL command to activate the console output. You only need to issue this command once in a SQL session.

SQL> SET SERVEROUTPUT ON
SQL>


Noe create a simple procedure which will give some standard output.I have used the following.

SQL> CREATE OR REPLACE PROCEDURE arpit
IS
BEGIN
DBMS_OUTPUT.PUT_LINE('Hello Arpit!');
END;
/ 2 3 4 5 6

Procedure created.

Now here consider the following

1>CREATE OR REPLACE PROCEDURE is the fixed command that you have to use while creating a procedure

2>arpit is the name of the procedure

3>the keywords BEGIN...END define a scope and is equivalent to a a java {}

4>the put_line function (in the built-in package dbms_output) displays a string in the SQL*Plus console.

So now our procdure is created now we will check how to execute it.


SQL> exec arpit;
Hello Arpit!

PL/SQL procedure successfully completed.

So you got an idea of how to create a simple procedure and how to execute it.

Now we will create a simple procedure in database and check how we can call it from jdeveloper.

here is my script for the procedure

CREATE OR REPLACE PROCEDURE TRANSFORM (
in1 in number,
out1 out number)
IS
BEGIN
out1 := 2 * in1;
END;
/

This procedure takes an input parameter in1 and produce an output parameter out1

In this procedure the input variable is multiplied with two and then it is assigned to out1.

This isn't a great example but i have limited knowledge in database side but i believe this example will tell you the usages of stored procedure and how it is called in Oracle BPEL.

so here goes my command in sql

SQL> CREATE OR REPLACE PROCEDURE TRANSFORM (
in1 in number,
out1 out number)
IS
BEGIN
out1 := 2 * in1;
END;
/ 2 3 4 5 6 7 8

Procedure created.

Now create a simple bpel process in jdeveloper.Let it be asynchronous only.

Now drag and drop a db adapter in the pallete


choose the database you are trying to connect to


choose the schema in next box and browse to choose the procedure


So it should now look like this


Now drag and drop an invoke activity and connect the invoke with the db adapter that we have created.

Again drag and drop two assign activity one in between the receive and invoke activity and another in between the invoke and callback client activity.

First assign activity assign the input variable to the invoke input variable.


next assign activity map the output of invoke to the output variable


In all your process should look like this


Once process is completed deploy it and check the output

I deployed the process and gave 12 as input


and the output i received is


So i believe you might have got the idea what is a stored procedure and how it is used.