Thursday, June 26, 2014

Dynamically Enable disable parameters in a concurrent program

We will first define a selection criteria .It will be an independent value set which will have two values.
Depending upon which values we select that particular field will be activated.
Let’s first define a Value Set for selection criteria
Navigate to the following path
System Administrator ApplicationValidationSet


Double click on the set and create a new value set for the selection criteria
Value Set Name- DEMO_SELECTION_CRITERIA
Validation Type -Independent


So once you have specified the size of value set save the changes
Now go back to ApplicationValidationValues


Search for your value set and find it


Once you find the value set add two values to it.
Employee ID and Employee Name


Create a dummy value set for employee id


Create a dummy value set for Employee name


Make sure for the dummy value set you have the validation type set as none.
Now once you have dummy value set ready create two values set for employee id and employee name of table type which will try to fetch the data from the per_all_people_f table.
Create value set for employee name and make it as table type as shown below


In the EDIT INFORMATION section of the above created parameter ‘EMPLOYEE_NAME’ add the logic :$FLEX$. DUMMY_EMPLOYEE_NAME = 'Y'


Test it to validate the query is correct
When I tested I got the below error the reason was that there was a space after :$FLEX$.


Removed the space and retested.


In a similar way now we will create a value set for employee id


In the EDIT INFORMATION section of the above created parameter ‘EMPLOYEE_ID’ add the logic :$FLEX$.DUMMY_EMPLOYEE_ID= 'Y'


Test and save all the changes.
Next is define a concurrent program and use all these value set in there
Go to System AdministratorConcurrentProgramDefine and create a new concurrent program


Define program name, short name and application.
Make sure the Executable in XDODTE and let the other things be the default


Click on parameters and define the value sets you have defined
First is the selection criterion


Next is dummy employee name


Specify Default type as sql statement and select the default value as shown below

SELECT DECODE(:$FLEX$.DEMO_SELECTION_CRITERIA,'Employee Name','Y',NULL) from dual
And make this a hidden parameter. This can be done be deselecting the Display button in the above page.

This Logic will ensure that this dummy parameter will select the value ‘Y’ when the ‘DEMO_SELECTION_CRITERIA’ parameter has a value of ‘Employee Name’. In turn the value of ‘Y’ in this dummy parameter will activate the ‘EMPLOYEE_NAME’ Parameter.

Next add the EMPLOYEE_NAME parameter


We will repeat the same steps for EMPLOYEE_ID we will first add the dummy employee id and then we will add the employee id parameter


Specify Default type as sql statement and select the default value as shown below

SELECT DECODE(:$FLEX$.DEMO_SELECTION_CRITERIA,'Employee ID','Y',NULL) from dual
And make this a hidden parameter. This can be done be deselecting the Display button in the above page.

This Logic will ensure that this dummy parameter will select the value ‘Y’ when the ‘DEMO_SELECTION_CRITERIA’ parameter has a value of ‘Employee ID’. In turn the value of ‘Y’ in this dummy parameter will activate the ‘EMPLOYEE_ID’ Parameter.
NEXT add the EMPLOYEE_ID Parameter.


NEXT IS defining a responsibility to execute this concurrent program.

GO to System administrator responsibility

Go to Security-->Responsibility-->Request

Double click on Request and press ctrl+ f11
This will bring up the following screen
Add a new entry there and select your concurrent program as shown below


Save the changes and switch to Application developer responsibility


Go to ViewRequest


Submit a new request


Select your concurrent program


And a pop up will come up like this


Select From the list of box


Employee Id and you will find that the EMPLOYEE_ID parameter is now activated.


Select Employee Name and you will find that the EMPLOYEE_NAME parameter is activated.


This is how we can dynamically enable and disable parameters in the concurrent program. This is very important when you are creating a report as a lot of requirement comes for enabling and disabling parameters dynamically

Bind Variable in Oracle SQL


Bind variables are the substitution variables that are used in place of literals.
This will be more clear with an example.

Lets take few queries

select department_id from employees where employee_id = 100
select department_id from employees where employee_id = 101
select department_id from employees where employee_id = 102

Here as you can notice that the query is same however the literal values(100,101,102) are changing.

so what will be the impact of this. If a user has to execute these line he will run these codes and each time
oracle has to parse the code and fetch the result from the database. this is cpu consuming. So in order to reduce this extensive timing what we can do it that we can define a bind variable instead of literals , so now our code will look like this

select department_id from employees where employee_id = :empId;

Here :empId is the bind variable.

Now once you execute this code that is it , one execution plan will be created in the oracle and then we need not do compiling and parsing the query again and again, this will save a lot of cpu and will improve the performance significantly

you can use bind variable as follows

variable empId number
exec :empId := 10
select department_id from employees where employee_id = :empId;

What we have done is that we have removed the literal variable with the bind variable.
We are defining a variable and we are using the same in the query.

In case of a pl/sql every reference to a PL/SQL variable is in fact a bind variable.

At this juncture you should also know about dynamic sql and how to use bind variable.

Dynamic SQL is a SQL statement which is constructed and executed at program execution time. Dynamic SQL provides more flexibility than the static sql.Dynamic SQL, allows you to execute a string containing SQL using the EXECUTE IMMEDIATE command.You cannot use EXECUTE IMMEDIATE for multiple-row queries.

declare
P_SQL varchar2(100);
p_ename EMPLOYEES.FIRST_NAME%type := 'bob';
begin
P_SQL := 'SELECT FIRST_NAME FROM employees WHERE employee_id = 100';
execute immediate P_SQL into P_ENAME;
DBMS_OUTPUT.PUT_LINE(P_ENAME);
end;
/

We can not define a DDL statement inside a procedure directly.Dynamic SQL allows us to run database definition language (DDL) statements and flexible programs like adhoc query systems and times when you are not sure of the full text of sql statement during the compilation time.


Decode function in Pl/SQL


Oracle PLSQL DECODE function in an inbuilt function which provides the same functionality as IF THEN ELSE

The syntax for a DECODE function is as below

DECODE( expression , search , result [, search , result]... [, default] )

Here expression is the value to be compared.

Search is the value compared against the expression value.

result is the actual output if expression matches the search value.

finally we have a default value which is used as an output in case expression does not matched the search value.

This will be very clear with an example.

Execute the following query and review the result

select (FIRST_NAME||' '||LAST_NAME) EmpName,
DECODE(EMPLOYEE_ID, 100, 'IBM',
102, 'Deloitte',
103, 'Oracle',
'Microsoft') RESULT
FROM employees;


This program can be also read as

select (FIRST_NAME||' '||LAST_NAME) EmpName from employee table

when Employee_ID =100 display result as IBM
when Employee_ID =101 display result as Deloitte
when Employee_ID =103 display result as Oracle

When the employee_id doesn' match the list provided the default result is microsoft.

This you can also validate from the result.

Wednesday, June 25, 2014

Warning!!! Due to high volume of data, got out of memory exception

While running a BI publisher report we normally uses XDODTE executable which is nothing but a java executable, It runs on a JVM. Sometimes when the JVM is overloaded with process it throws below error

Warning!!! Due to high volume of data, got out of memory exception
Please retry with scalable option or modify the Data template to run in scalable mode.


This issue can be resolved by running the concurrent program with jvm options

Navigate

System Administration-->concurrent-->Program-->Define

and change the option for a suitable jvm value such as

-Xss2560k -Xmx2560m


Xss Sets the JVM to 2.5GB .
Xmx Sets heap size to 2.5 GB. ( For 32 bit JVM this is the maximum memory which can be allocated).

Now run the concurrent program again and your issue will be resolved.


Report Creation in Oracle EBS using XML publisher

In this exercise we will see a full cycle on how to create a report in Oracle EBS. This will include creation of the tables and fetching the data from table to display the output in pdf format.

Install BI Publisher which will install the plugins in words document in Add-Ins tab.
Go to apps database back end and create a table.

create table employee (name varchar2(30),Employeeid varchar2(20),salary integer, designation varchar2(30),location varchar2(40),department varchar2(40))


Insert some date in to the table.


Now create a data template for the record to retrieve all the data from the database.

<?xml version="1.0" encoding="UTF-8" ?>
<dataTemplate name="XXAMW_TEST_SAMPLE" version="1.0">
<dataQuery>
<sqlStatement name="Q_HEADER">
<![CDATA[select name,employeeId,salary,designation,location,department from employee]]>
</sqlStatement>
</dataQuery>
<dataStructure>
<group name="G_HEADER" source="Q_HEADER">
<element name="Name" value="name" />
<element name="EmmployeeID" value="employeeId" />
<element name="Salary" value="salary" />
<element name="Designation" value="designation" />
<element name="Location" value="location" />
<element name="Department" value="department" />
</group>
</dataStructure>
</dataTemplate>


Now log in to oracle apps
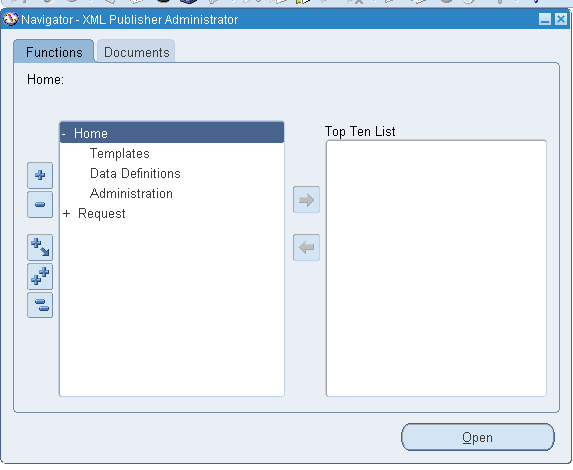
Go to XML publisher responsibility


Double click on Data Definition
Create a data definition


Application Name=XXX Custom (Created by admin or Functional people)
Specify the name, code and application name


Apply and attach the Template in the next page


Apply the changes.
Define a concurrent program

Go to System Administer responsibility-->Concurrent -->Program-->Define


Executable-XDODTEXE
XXX Custom=Application name
Save the page.

Go to Security-Responsibility-Request
F11
Group- OM Concurrent Programs
Crtl+F11
Will populate the records
Click on one of the program and say new


In order to verify at the back end whether the concurrent program is created or not.
Go to back end database and search for following
select * from fnd_concurrent_programs_VL where concurrent_program_name='XXX_AR'
you will get a record for the same


Switch responsibility to Order Management Super User
Say View request –Submit a new request


Complete and view the output, you will find the sql data retrieved in xml format


Here G_Header in the group name from the data template.
Now in order to create a pdf from this
Save this XML file in your desktop.
It got saved as XXX_AR_240513.xml for me by default
Open a new word document
Go to Add-Inns tab
Click on data and load XML data


Go to insert tab and insert a table with 6 columns and 2 rows as shown


Save this document as .rtf in your local machine
Now go to each row and insert the corresponding field
And save the form now you can actually see the pdf by going to preview button
It will show the first record
Back to


It will not show all record as we have not used for each.
Now in order to see all the columns we will add a for each condition in the starting column “Employee Name” and will end it on the last column “Employee Designation”
Go back to you rtf document.
Copy paste the same name component and double click on it.


and change it to following


If you will observer G_HEADER is the repeating record in the XML document we have created. Also name it to a logical name.
Similarly go to the last column and end the for each loop


So once done your final rtf document will look something like this.


Go to RTF document –Add-Inns and view pdf
Now you should be able to see all the records in the PDF format which means the template is correct one.


Now once we have got the demo pdf we will go and register this rtf document in the EBS and run a concurrent program to see if the output is successfully generated in EBS or not.
Switch to XML Publisher responsibility and double click on Templates


Create a new template


Specify all the details and attach the RTF file.


Now go back to the applet and switch back to Order Management Super User
Go to View Request and initiate a request


Submit a new request


Check if the request is complete normally


Click on the completed record and say view output.
It will generate the output


This is one complete cycle of report generation.