When you upgrade your SOA from 11.1.1.2(11g release1 patch set1) to
11.1.1.3(11g release1 patch set 2) the BAM schemas do not upgrade to 11.1.1.3 version.
It will still be 11.1.1.2 so you can query your database to verify this
go to sql and issue a command.
select version, mr_type from schema_version_registry where MR_TYPE='BAM'
11.1.1.3 patch set upgrade schema upgrade only following components
Oracle Portal and SOA Infrastructure (SOAINFRA)
Saturday, July 31, 2010
JMS Request/Response scenario in SOA Suite 11g
We have already seen an example of how request response scenario works in OSB ,Now we will see how this scenario work in SOA Suite.
Thursday, July 29, 2010
Outbound dbAdapter sample in Oracle Service Bus
In last exercise we have seen an inbound scenario now we will see how does OSB work in an outbound scenario.
I believe you are using the same db connection which we have used in our last exercise.
Open up your jdeveloper
Create a new project ,make it an empty bpel process

Drag and drop a db adapter and give it some logical name


Make an insert operation

I am using the same table which i have created in my previous exercise

Now keep on saying next by choosing one primary key and save it so you project will look something like this
You can notice there are two wsdl file created.
One is the wsdl file that contains the information which we have provided through the gui and the other is outbound header wsdl file which is created automatically by the jdeveloper.

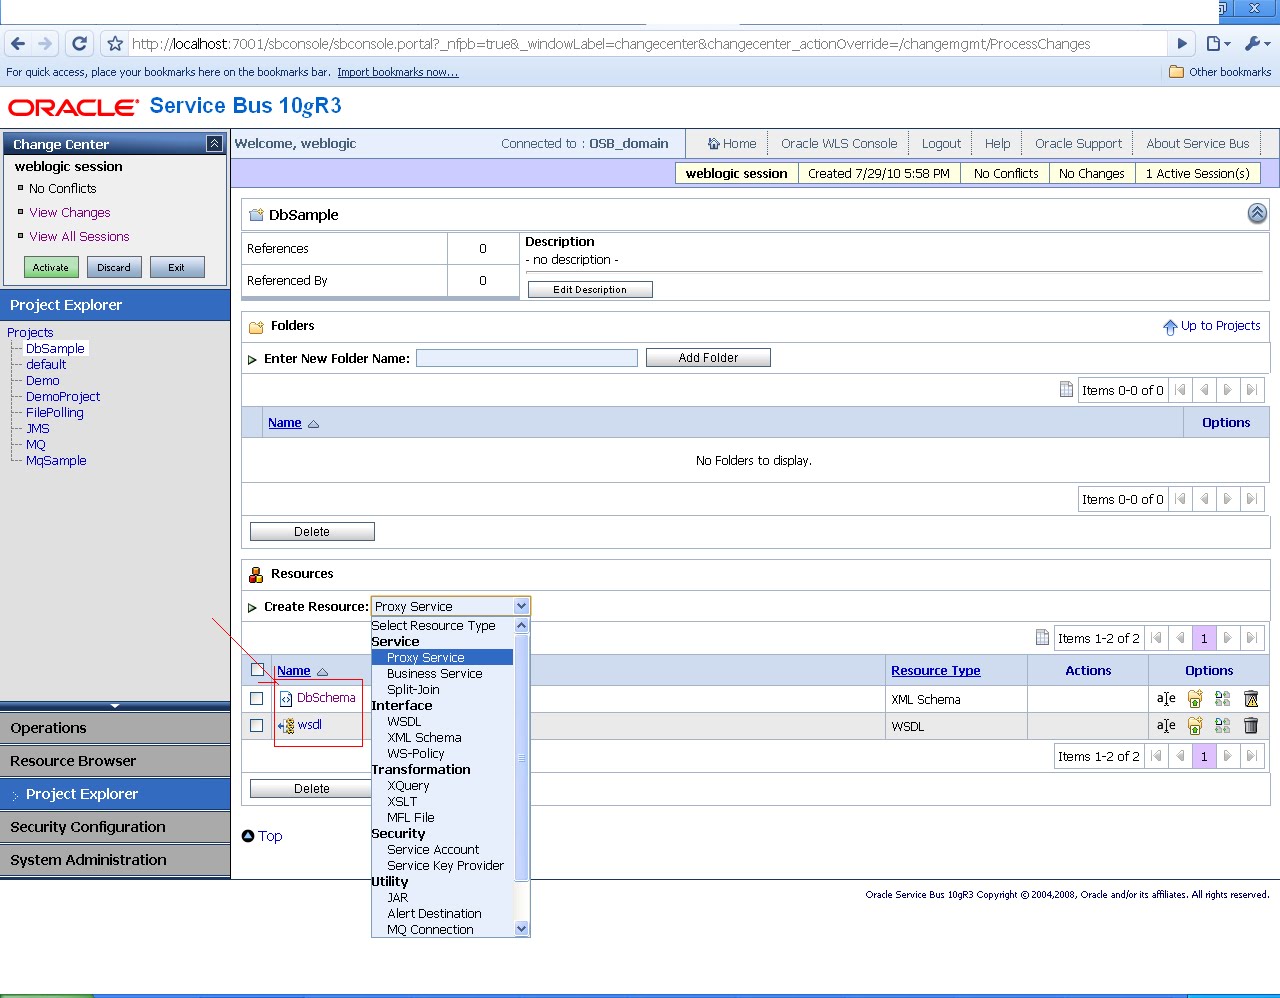
Now we will create the proxy service in osb.log in to osb console and create a new schema interface.

Choose the xsd file that is generated for the outbound service created

Now create a wsdl interface

Choose the outbound header file first as shown below

Now create one more wsdl interface and choose the dbadapter wsdl created for the gui
and save them.

Once all files are imported.
Create a new business service and call the wsdl for the gui,I am not sure why proxy service didn't work in this case
Every time i was trying to do so i got error like
Invalid WSDL for JCA proxy service. If you are creating a Proxy from a Business Service, please select a different transport type (for example, http). If not, WSDL must contain JCA activation spec properties.
Type com.bea.wli.sb.transports.TransportException
I believe we are performing a business of inserting the data in to database and it is not just a simple proxy call hence we are not able to make it work with proxy service.
Create a new business service

Select the port for the wsdl for the gui

Verify your connection details

Now in the next screen choose your toplink file

Just click on next and save your project.Once saved activate your changes and test the process by clicking on the following location

Unfortunately when i test this i got this error
The invocation resulted in an error: Invoke JCA outbound service failed with application error.
I am not good in debugging OSB and not sure which all files to located to find out the error and how to fix this.I will be trying to get this fixed.In the mean time if reader can suggest on this they are most welcome.
Well i got this before any one could get back to me.The reason was that my listener was not up.I started my listener and it started working.
So you must keep in mind the following steps
1>Your listener is up.
2>Database is up.
3>You have configured you data-source(refer previous post)
4>You have configured connection factory.
And most important is that when ever you create a new connection(outbound) don't forget to update it from deployment and it should work so in my case i got the following output

And in my database i can see the data being updated

I believe you are using the same db connection which we have used in our last exercise.
Open up your jdeveloper
Create a new project ,make it an empty bpel process

Drag and drop a db adapter and give it some logical name


Make an insert operation

I am using the same table which i have created in my previous exercise

Now keep on saying next by choosing one primary key and save it so you project will look something like this
You can notice there are two wsdl file created.
One is the wsdl file that contains the information which we have provided through the gui and the other is outbound header wsdl file which is created automatically by the jdeveloper.

Now we will create the proxy service in osb.log in to osb console and create a new schema interface.

Choose the xsd file that is generated for the outbound service created

Now create a wsdl interface

Choose the outbound header file first as shown below

Now create one more wsdl interface and choose the dbadapter wsdl created for the gui
and save them.

Once all files are imported.
Create a new business service and call the wsdl for the gui,I am not sure why proxy service didn't work in this case
Every time i was trying to do so i got error like
Invalid WSDL for JCA proxy service. If you are creating a Proxy from a Business Service, please select a different transport type (for example, http). If not, WSDL must contain JCA activation spec properties.
Type com.bea.wli.sb.transports.TransportException
I believe we are performing a business of inserting the data in to database and it is not just a simple proxy call hence we are not able to make it work with proxy service.
Create a new business service

Select the port for the wsdl for the gui

Verify your connection details

Now in the next screen choose your toplink file

Just click on next and save your project.Once saved activate your changes and test the process by clicking on the following location

Unfortunately when i test this i got this error
The invocation resulted in an error: Invoke JCA outbound service failed with application error.
I am not good in debugging OSB and not sure which all files to located to find out the error and how to fix this.I will be trying to get this fixed.In the mean time if reader can suggest on this they are most welcome.
Well i got this before any one could get back to me.The reason was that my listener was not up.I started my listener and it started working.
So you must keep in mind the following steps
1>Your listener is up.
2>Database is up.
3>You have configured you data-source(refer previous post)
4>You have configured connection factory.
And most important is that when ever you create a new connection(outbound) don't forget to update it from deployment and it should work so in my case i got the following output

And in my database i can see the data being updated

Inbound Db adapter Sample in OSB
Create a new empty bpel process from jdev

Now drag and drop a db adapter in that and give it some logical name

I already have created a user arpit and a table customer in database which i will use here

Connect to the database

Do a poll record as per your requirement and say next import the table.


Select a primary key

So it should look something like this

Now log in to osb console
http://host:port/sbconsole and create a new project

Now go to your project and create a schema file

Choose the xsd file that is created for the database adapter conection

A schema file will be created as shown in diagram circle.Now create a wsdl interface

Again choose the wsdl file from the same folder location

No create a proxy service

choose the wsdl you have created earlier

choose port and say submit

Say next and verify the jndi name

Say next and again browse the toplink file from same folder location

keep on saying next and finally save the changes.
Now to make sense to this project i will add a business service which will write the data to an output file.
Create a new business service

Give it some logical name

provide the directory where u need to store the output

Add the service and keep on saying next till you find the save.Save the configuration and activate it.
NOw create a business action.Edit the message flow for the proxy service

Now add a routing service to it

Edit the route service by clicking on it and then saying edit
Now on create an action page add a routing action

Now click on service and choose the business service which you have created to write data to output directory.

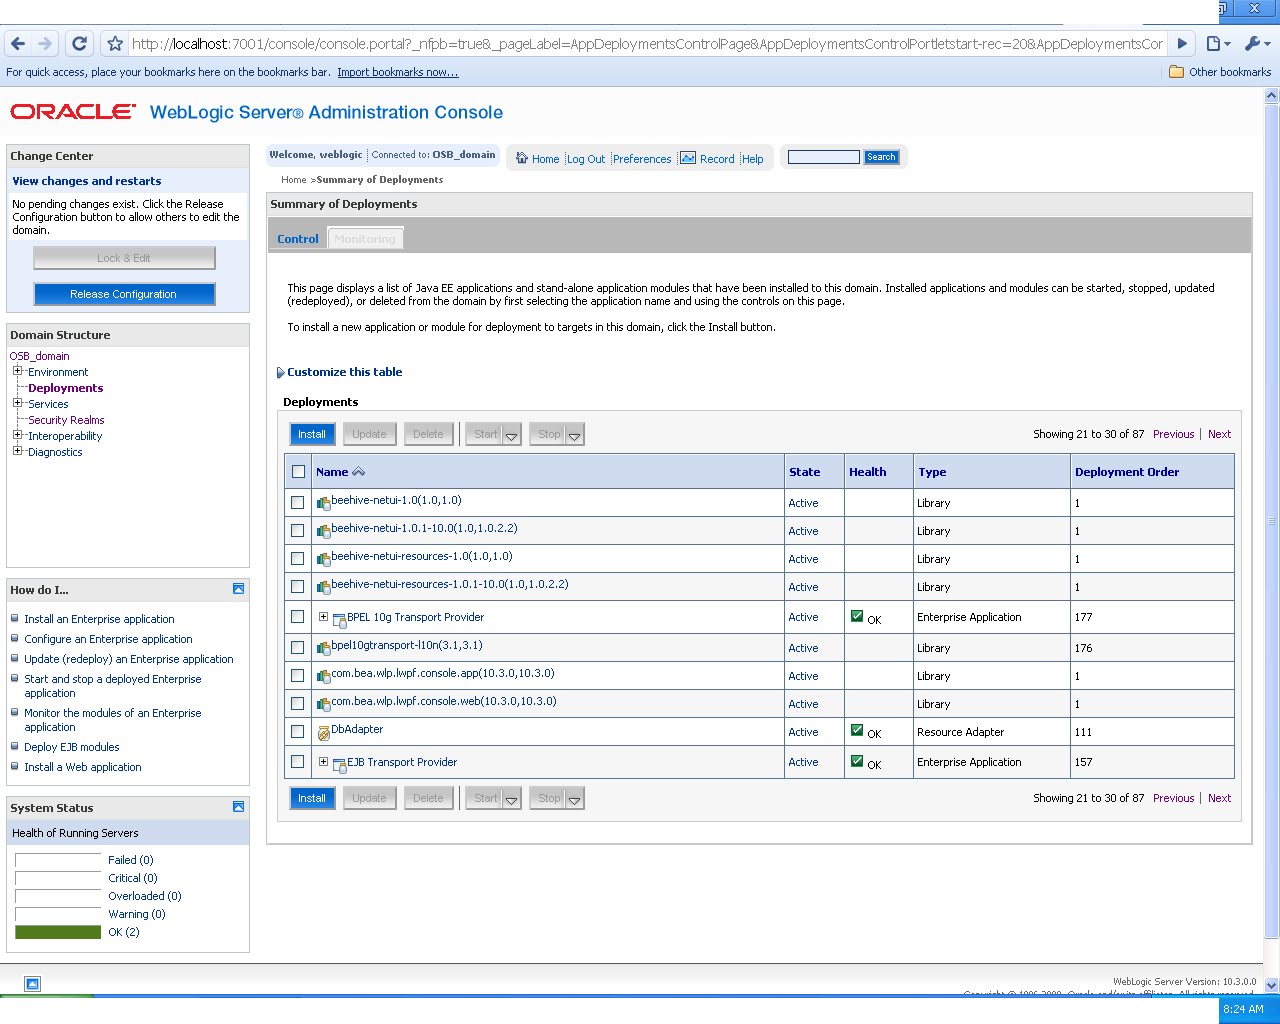
now save the changes and then activate it and your business process is complete.Now to verify its use case,Insert a data in the table and see you have the file generated in the output directory.I assume that you already have create the db resource from the weblogic console of OSB.If not here are the steps.
Log in to the console
http:host:port/console
and goto deployment->DbAdapter.

Create a new connection

Create a connection for the jndi which you are using in your case

Save the changes and redeploy the db adapter using update option and you are not ready to go with the test case.
I believe then you must not configured your data sources too so here are the steps.
Log in to admin console http://host:port/console
Go to Services-->JDBC--->Datasources
and create a new data source

Provide the details for database and test the connection


Now a more configuration is required that is update the data source in your connection factory.
go to deployment
choose db adapter
Go to configuration tab
Outbound Connection Pool
and choose the connection you have created and update the xa datasource name over there

Now once done update the properties again.This should work now.

Now drag and drop a db adapter in that and give it some logical name

I already have created a user arpit and a table customer in database which i will use here

Connect to the database

Do a poll record as per your requirement and say next import the table.


Select a primary key

So it should look something like this

Now log in to osb console
http://host:port/sbconsole and create a new project

Now go to your project and create a schema file

Choose the xsd file that is created for the database adapter conection

A schema file will be created as shown in diagram circle.Now create a wsdl interface

Again choose the wsdl file from the same folder location

No create a proxy service
choose the wsdl you have created earlier

choose port and say submit

Say next and verify the jndi name

Say next and again browse the toplink file from same folder location

keep on saying next and finally save the changes.
Now to make sense to this project i will add a business service which will write the data to an output file.
Create a new business service

Give it some logical name

provide the directory where u need to store the output

Add the service and keep on saying next till you find the save.Save the configuration and activate it.
NOw create a business action.Edit the message flow for the proxy service

Now add a routing service to it

Edit the route service by clicking on it and then saying edit
Now on create an action page add a routing action

Now click on service and choose the business service which you have created to write data to output directory.

now save the changes and then activate it and your business process is complete.Now to verify its use case,Insert a data in the table and see you have the file generated in the output directory.I assume that you already have create the db resource from the weblogic console of OSB.If not here are the steps.
Log in to the console
http:host:port/console
and goto deployment->DbAdapter.
Create a new connection

Create a connection for the jndi which you are using in your case

Save the changes and redeploy the db adapter using update option and you are not ready to go with the test case.
I believe then you must not configured your data sources too so here are the steps.
Log in to admin console http://host:port/console
Go to Services-->JDBC--->Datasources
and create a new data source

Provide the details for database and test the connection


Now a more configuration is required that is update the data source in your connection factory.
go to deployment
choose db adapter
Go to configuration tab
Outbound Connection Pool
and choose the connection you have created and update the xa datasource name over there

Now once done update the properties again.This should work now.